Everything You Need To Know About Planting A Herb Garden

An herb garden is a great gateway into gardening. If you haven’t had much gardening experience or just don’t have a lot of time or space to create a full vegetable patch, then creating a herb garden looks like it will be just right for you. An herb garden has so many benefits. As well as providing you with delicious fresh herbs that you can use in your cooking, teas and herbal remedies, an herb garden also provides plants for bees to collect pollen from and an amazing aroma that will fill your garden. Herbs do require attention and cultivation but often once they have been going for a while they can grow a little wilder on their own. All herbs, however, do have different growing needs. Some herbs like shade, some sun and others a mixture of both. Also, their water needs and soil needs can be slightly different also. We’ll go through some of the most popular herbs you can grow in your backyard and their needs. So read below and get familiar with the different herbs and see which ones will suit you and your backyard the best.

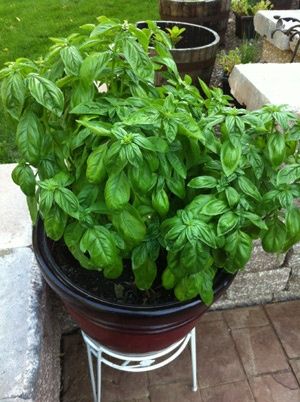
Featured in cuisines across the globe, basil is an indispensable flavoring. Plant seeds or transplants after all danger of frost has passed and soil is warm, and it will yield an abundant harvest within weeks.
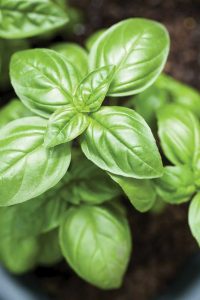
 

Basil

Let’s start with Basil, a fresh and aromatic herb with vivid green leaves used in a lot of Mediterranean cooking and often reminiscent of summertime! It has also been used for its medicinal products of aiding digestion and curing headaches and even mild depression.

Basil is a great herb to grow from seed. Planting in the rich fertile soil, the best times to sow are spring and summer. Basil needs at least six hours of full sun a day. It really loves soaking in the suns rays.

Keep an eye on your Basil on about the six to seven-week mark when it starts to shoot up and take the top off the plant. This will help prevent it flowering too soon and also give more energy to the side shoots so you get a nice and full looking bush.

Keep your soil warm and full of moister (just think of the Mediterranean soil!) You’ll know when it’s time to start picking your basil, small buds will start to appear and you want to get in there before it goes to seed. The great thing about basil is you can pick a little a day when you need it and then with a good prune every few months you should have a plant that goes year round.


 Parsley

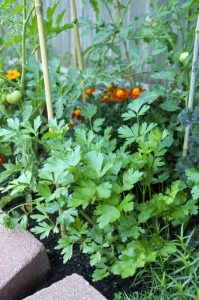
Parsley is a wonderfully versatile herb, used as a garnish around the world it can be adapted to many dishes. As a little sprinkling on top of a hearty winter soup, or picked in bunches for a green summer salad, parsley is a great all-rounder and filled with iron, this is a must-have herb.

The best time to grow parsley from seed is in autumn and spring. Parsley loves a little bit of shade so find a semi-shaded spot in your garden to keep it happy. Your parsley plant will tend to just grow and grow with the right conditions, but if you want to keep a good fresh flavor, try replanting it every year, by collecting the seeds in the autumn and then sewing them again in spring. Parsley is a hardy plant and like a lot of other herbs, do best in the moist and rich soil.

Cut the leaves as you need them, and you can also cut off a bunch and keep in for a few days on your kitchen bench in some water so it is right on hand for your cooking.


Mint

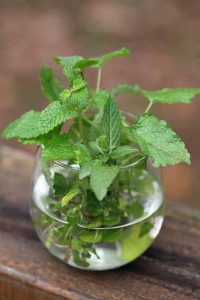
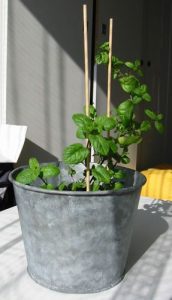
Mint is another favorite, used in so many ways for so many things. There are a few varieties of mint such as. Apple mint, Vietnamese mint, Spearmint and even Chocolate mint! Mint is perfect as a garnish in cold drinks; all the best summer cocktails have some mint in them!! It can also be used fresh or dried for hot tea that has great digestive properties and can help relieve tension, stress, and headaches. Bees and butterflies love mint and they will fill up your garden in summer.

Mint doesn’t mind the sun, and once it gets going it can really spread like wildfire through your garden, that’s why a lot of people tend to plant them in pots to keep them a bit more contained. It does not need super rich soil to grow but does like moisture. Cutting plants right back is the key. Don’t be afraid to cut off whole stems at a time, it will only help promote new growth and keep your plant thriving.
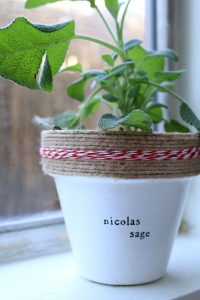
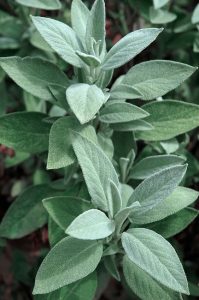


Sage

Sage has beautiful light green leaves and a bold scent, which is both delicate and powerful. It has been used on many a Thanksgiving turkey over the years and goes well with egg and bean dishes to give them a unique taste. You can even use the blossoms in a salad! Its wonderful aroma can be smelt throughout the garden.

Sage can be planted from root cuttings as well as seeds; fresh seeds always work better when it comes to sage. Sage loves the full sun and drained soil. Once they start to grow you can ease off with the watering a little, then watch them flourish. Sage has slightly woody stems and needs to be pruned back yearly. Spring is the optimum time for this. These plants will only produce in a bountiful way for a few years a time. You may wish to consider planting another bush in the second or third year of your plant’s life to replace your original.
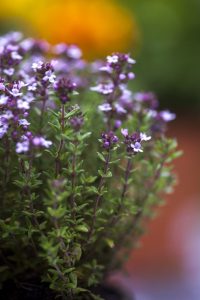
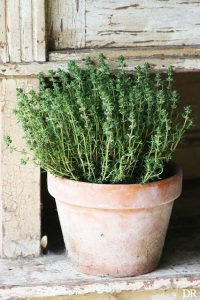
 

Thyme

Thyme is a bit of a creeper and likes to stay relatively close to the earth. If you put it in a pot it will end up cascading over the sides in a marvelous way. Thyme is a great addition to your kitchen and is often used in chicken dishes to compliment the flavor. It is also said to have great antifungal and antiseptic properties. The most popular thyme is English thyme and it can look beautiful simply as a decorative plant small rocky outcrops.

Another herb that likes sun; but needs protection from harsh winds. Thyme can be tricky to grow from seed, so if you are struggling it may be best to purchase seedlings from your local gardening store instead. It prefers light soil to moister rich. Trim gently during spring and summer to promote new growth, and harvest whenever you need a little flavor in the kitchen.
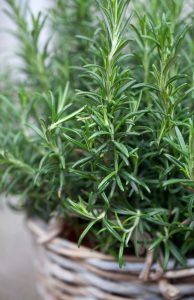
 

Rosemary

The smell of rosemary can be quite intoxicating. Its long woody stems that reach for the sky are often used in ornamental gardens and trimmed like hedges. It is often paired with lamb and many a cook has gotten creative and used the woody stem as skewers in cooking. It also does amazingly well as a garnish in drinks and can even be steeped overnight to create a wonderfully flavorsome tea.

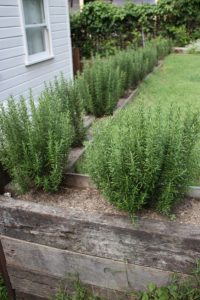
Rosemary is another sun sucker, but once it has matured, won’t mind a bit of shade every now and again. If left to it’s own devices rosemary can spread quickly and become woodier than is useful. That’s why it’s important to give the plant a rather brutal trim in early spring and allow the leaves to really flourish.
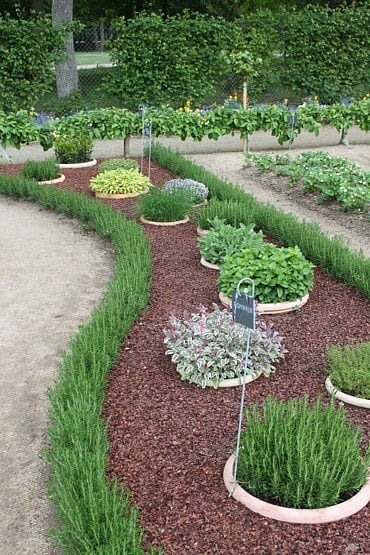


So Many Herbs

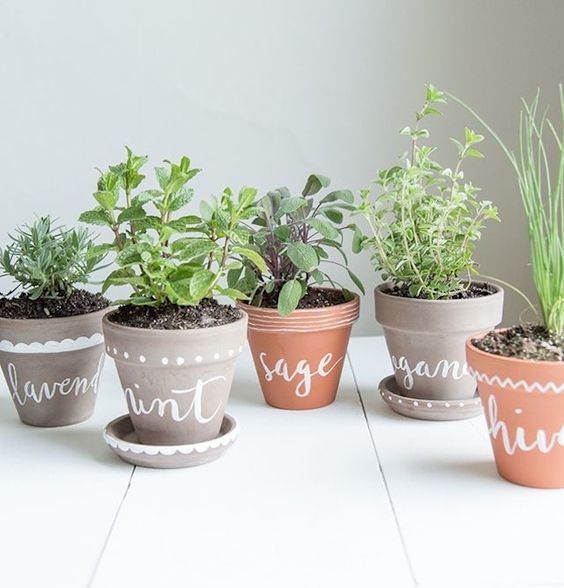
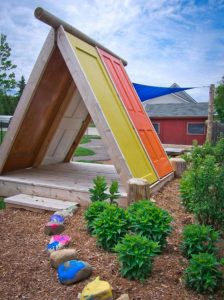
We’ve only just scratched the surface of all the wonderful herbs there are out there. Once you have chosen the herbs you like best based on smell, taste, and usefulness to you, it’s time to get creative in the way you plant them. From a vegetable style herb garden to balcony pots, here are some ideas to get your herbs looking amazing.


Tool Shed Storage Ideas

New Year, New You, that’s how the saying goes right? Well, while everyone has been making resolutions about eating right and spending less time on their phones, we’ve been thinking more along the lines of New Year, New Shed! And while the bank account isn’t quite full of new shed money there are some things we can do to make the garden shed feel like new, at least on the inside. After another busy year, it’s once again full of clutter. Hammers are in buckets, drill bits missing and spanners are where the screwdrivers should be. If you’re feeling the same and want to start off 2018 with a new start then why not give your shed interior a bit of an overhaul. We all know how annoying it is when you go out to the shed just to get that one thing and end up spending an hour wading through miscellaneous junk and still don’t know where your shovel is. Starting the year off with a clean slate will not only give you that great feeling you get when everything is neat, tidy and has its own place, but also once your shed is in order it’s more likely you’ll want to spend more time in there working on all those projects you’ve been meaning to do for the last year. So to give you a little push in the right direction we’ve put together a few great DIY ideas to get your shed looking ship shape and ready for action.


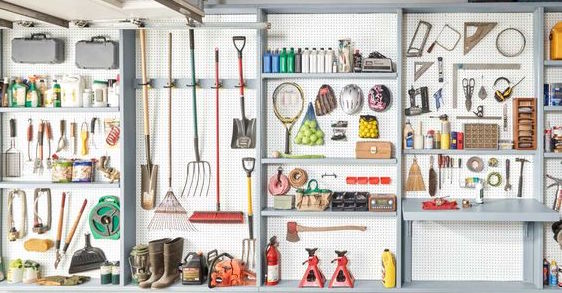
Making a Simple Pegboard

We are going to start with a big one! A pegboard to hold most of your small to medium sized tools, the kind that is always getting misplaced or lost. Having a good pegboard just makes life so much simpler, you can walk into your shed and everything is right there laid out in front of you, you can just grab what you need and when you’re done you’ll know where to put it back, also the empty spaces will tell you if there is anything missing so if you do by chance misplace something after a day of DIY then you’ll know sooner rather than later to have a look for said item.

To start making your pegboard you’ll have to measure up space in your shed. Make sure it’s at a good height so you do not have to use a stepladder to get to things, the whole point of a pegboard is to make it easily accessible. Once you have your dimensions head down to your local hardware store and check out what they have to offer. Some stores will only have precut pegboard, in which case you can purchase the one that comes closest to your dimensions, if it’s a little too big you’ll have to cut it down or if it’s not big enough consider buying two and piecing them together. If you can get one custom cut then that’s even better! Keep in mind you’ll have to build a support frame too so you’re not mounting it straight onto your wall. A few bits of treated pine will work perfectly for this. And of course, don’t forget the pegs!!

First, start by fixing what will be your frame to the wall. You can do this with two horizontal pieces of wood for the top and bottom and then your two vertical pieces a little in from each side to give the middle of the board support. If you’re fixing your frame onto brick then use a Hammer Drill and spaghetti wall plugs into each hole to give the screws extra hold. Make sure you have used your spirit level to balance your frames properly before screwing in. The last thing you want is your tools all tilted to one side!

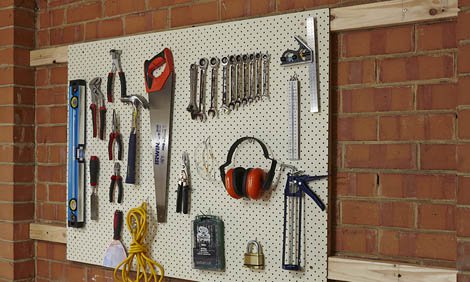
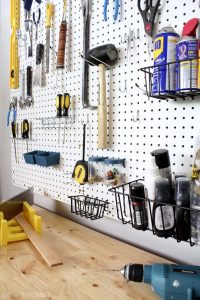
Now a little tip, it’s actually easier to arrange your tools and peg positions before you mount your pegboard. Put your board on the ground or a large table that you can easily stand over and start to arrange your tools in the position you want them. It’s a little like a game of Tetris, trying to make everything fit together well. Take your time having a play around to get things in space you really like. Once you are happy with this, you can draw around each item with a black permanent marker. This will help remind you where everything goes and it will be easy to spot if something is missing. Once you’ve done that, pop your pegs into position then take off your tools and mount your board.
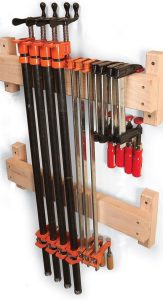
Now it’s time to attach the pegboard. You can do this by using some simple chipboard screws, make sure you put enough in to carry a fair amount of weight, a spanner might not seem that heavy on its own, but add in a set of them plus hammer and…well you get the picture.                                     Remember to screw the board to the inner vertical frame too to help spread the load.

When it’s all up you can now easily pop your tools into their allotted positions, stand back and marvel at your own handy work and how organized your shed is looking already!

Making a Screwdriver holder

A simple pegboard won’t hold everything because not all of your tools are made to hang. So the DIY is not over just yet! We’ve got a few more ideas to come so that you will truly have a place for everything in your new and improved shed. Let’s start with a screwdriver holder. This is a simple contraption to make and only requires a handful of screws, some pine or the wood of your    choice and some drill bits.

Start by getting a piece of wood long enough to hold all your screwdrivers. You can make double rows if you have a shorter piece. Mark out with a pencil where you will drill down and fit the screwdrivers. Make sure you allow enough space in between each hole for the handles, as some screwdriver handles can be chunkier than others. Once you’ve done this select a drill bit that will fit all of the metal shafts but not let the handles slip through, then drill through your wood. You can now attach this to another wooden block to make a T Shape and then screw that either into your pegboard or another space on your wall. And now you have a handy play to keep your screwdrivers.


Making a Clamp Rack

Clamps are another one of those things that seem to end up all over the place. So how about giving them a proper home by making a clamp rack. Using a simple I shape design get three wooden blocks, to smaller and run the vertically and one larger and longer and run that horizontally over the top on them, making sure there is room either side on the small blacks to allow space to drill them into your wall. Once they are in place, screw together and find a good bit of wall space at a nice height and attach. Now you will be able to hang your clamps and access them easily.


Getting Creative With PVC Pipe

Amongst your miscellaneous shed items, you probably have some PVC pipe left over from old projects and if so here are a few nifty little ideas that will help organize your space even further, creating places to store those bigger items and also the tiny items that so often roll off your bend and onto the floor to never be seen again!

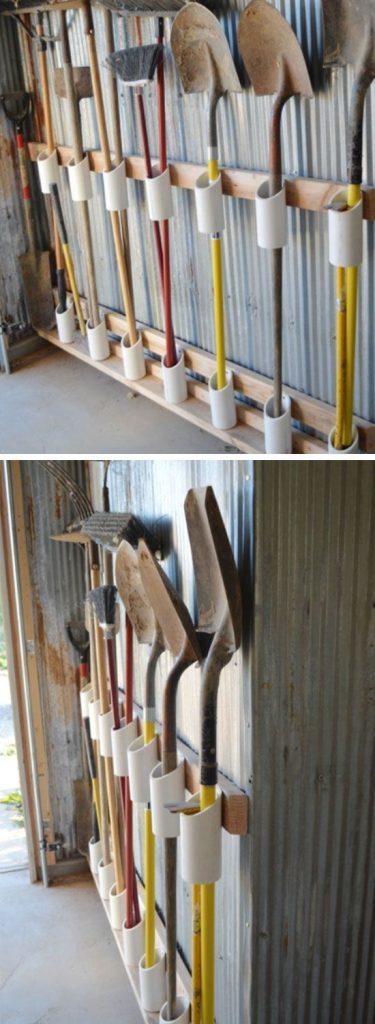
Making a Shovel and Rake Holder

This one is a brilliant idea; a lot more tidy than just hooking them onto a wall where they get bumped off constantly. All you’ll need is some of your PVC pipe (if it happens your one of the tidier people who doesn’t just have it laying around, duck to the hardware store and grab some!) and four lengths of four by two. Usually, the entrance way to your shed or down the back wall is where these are stored, so find your space and measure up your lengths to suit.

Next, you’ll want to cut your pipes at around eight inches on a slight angle to make an easier entrance point and also you’ll have a higher point where it is easier to drill and fix into position. You’ll want one for the middle and one for the bottom of each tool.

Once you’ve cut enough fix them into position on two of the horizontal boards but screwing into the higher piece of pipe. You’ll want to measure your spacing very carefully so that the top and bottom boards line up and correspond with each other.

Now attach these two pieces with the pipes to your wall, again making sure they are level and spaced to their corresponding pipe.

The final touch is creating an L shape Shelf with the remaining pieces of two by four. This little shelf will screw into the wall just under your bottom pipes to allow a resting place for the bottoms of your rake and shovel handles.

And there you have it, a simple and effective solution to stowing your long-handled tools in a way where they can’t be knocked about or accidentally fall.


Bits and Pieces Holder

This is another great idea for a place to put pencils, electrical ties, and other little items, it can be made on a small block of wood and then fixed to your pegboard also.

All you’ll need is a block of wood and some smaller PVC Pipe. You can cut your pipe to a uniform length or a few different sizes to custom fit your small lightweight items. Again cut at a 45-degree angle because this time you will be attaching the angled edge to the board with a simple screw through the bottom. Have fun with your design and fit in as many or as little pipes as you like. The best way to store all those random small items that won’t fit anything else.


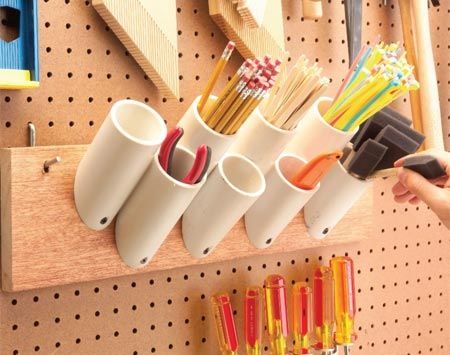
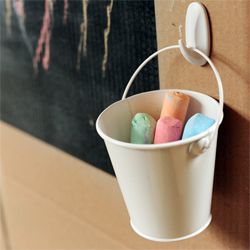
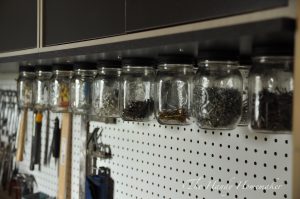
Making Nail and Screw Jars

One other thing you can do to really add to your pegboard and complete your organization is to add the small protruding shelf from the top with nail and screw jars attached. Keeping your nails and screws in these jars is genius. You can do this using glass or plastic jars.

Get a piece of wood that can span your pegboard with enough room to sit comfortably on top of the pegboard frame and be screwed down, while allowing enough overhang for the jars to attach comfortably without rubbing on the pegboard. Once you’ve found your right size take all your lids off the jars and lay them top down on your wood, allowing for enough space between each one to be able to screw the jars on easily. Once you have your spacing right it’s as simple as putting a screw through the middle of each lid to attach it to the wood. Now you can flip your board over and fix it to the top frame. Once it is in place and screwed down, simply fill your jars with all your nails, screws and other bits and bobs and screw onto the fixed lids.

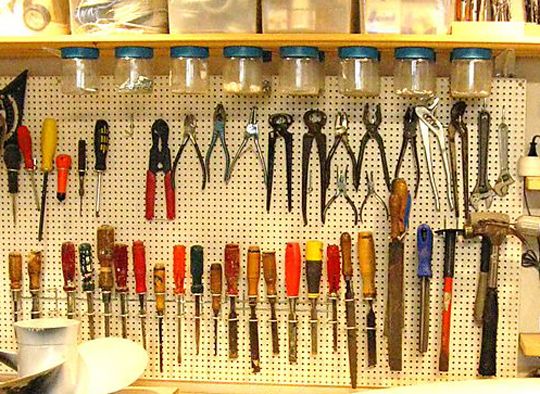
A Place for Everything and Everything in its Place

Now you’ve got a tidy shed with a place for everything it’s time to get inspired by all the other DIY projects to come. Having an order to your space will make a big change in how fast you are now able to get things done and also how much more likely you are to make what was only days ago, a dreaded trip to the shed! Good luck with all your 2018 projects!

DIY Kids Cubbies

With the summer holidays fast approaching, if you have kids then chances are they are going to be home a lot for the next few months. I’m sure you want to keep them as occupied as possible and get them outdoors to make the most of this great season, but if you are at work a lot then you won’t be home to make sure each of their days is jam-packed with fun. So why not invest a little time into making an outdoors cubby with your kids and then they’ll have somewhere to play and really make their own over the holidays. All you’ll need is some simple DIY tools and materials you can ether buy for salvage.


Getting the kids involved

Get your kids excited about the project by enlisting their help in generating ideas, after all this is a cubby for them, somewhere they can play for hours every day so you want to tailor it to their needs and likes. You can take their ideas which are probably quite grand and help them see how you can scale it back to be something achievable and to fit into your yard, you’re not going to be able to build a tree house if your yard does not have any trees! Planning this project with your kids can give you some quality time together as well as being a fun activity that gets every ones creativity going. And then when it is time for the actual building, fitting out your kids with some tools and hard hats will really make them feel like a part of the team and very proud of their new space knowing that they contributed to it.

Cubby Types

If you’re having a few mental blacks about what kind of cubby or tree house would be suited to your yard then stress no longer, we’ve put together a list of some different kinds of cubbies to suit every backyard and every budget. Remember, cubbies do not have to be massively expensive things.


The Tree House

If you’re lucky enough to have some bigger trees in your yard then have a think about building a tree house with your kids. Kids love being up in the branches naturally and to make a space that is just a little more unreachable for adults is something that will make it extra special for them.

To start with you will need to decide if you want to have a cubby that is grounded but wrapped around a tree or if you want to have the tree providing the main structural support for your cubby. If it is the latter you will have to make sure your tree is big and strong enough to support a fair bit of weight, even though children are small, get a few of them up there and the weight may dramatically increase. Safety really needs to be the base of your building.

If you do choose to have a tree house that is up in the branches, start by designing the house around the tree. Make sure if it is up higher than a meter that you have proper railings on the cubby to lessen the chances of falls. Things like rope ladders and trap doors are great added extras, it’s the little details that kids will love.

There are plenty of tree houses you can do that have their foundations on the ground if your trees are not tall or strong enough but you still want to incorporate that element of nature into them. Design a base that can easily fit around your tree/s and to give it that tree house feel you can still make it higher up so that to enter kids will have to climb up a rope or wooden ladder.

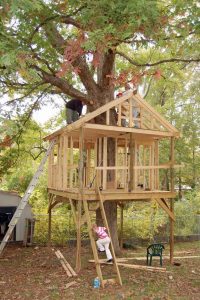
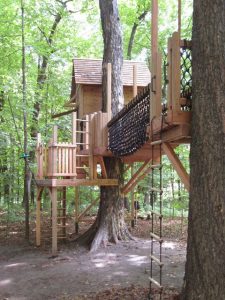
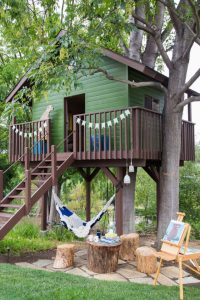
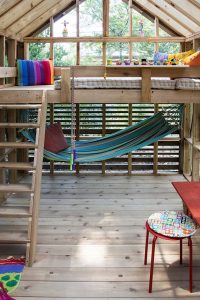
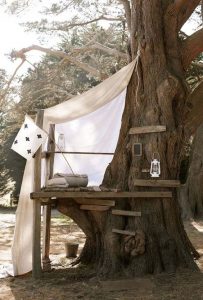
These kinds of tree houses can be more on the expensive side, requiring more timber and supports for safety and quite time consuming as building anything off the ground will require a bit more effort, but if you are on a budget and want to be building something up in the branches there are other ways to make simple tree houses. If you have a bigger based tree with some great wide branches on it how about start with making a simple platform. Using pieces of wood nailed straight into the trunk you can quite easily make a ladder and then a small platform between branches. Even a simple frame like this can be captivating to children and if you don’t have the materials for a roof, try draping some old canvas or even sheets in the summertime to give it a bit more of a fort feel.


Free Standing Cubbies

If a tree house is not a viable option for you then try out a freestanding cubby. You can make a basic square or rectangular base and then build on from there. Consider if you want an enclosed space or more of an open fort style. If you are going for the enclosed look make sure you still have plenty of airflow coming through. Closed in cubbies that are not sealed properly can really let damp in and end up smelling not so great if left unattended. Get creative with your windows shapes and door openings. Your freestanding cubbies can still off the ground and provide creative ways of getting in and out. Think about spider webbing type ladders or even rock wall shapes to make an extra fun entrance.

There are a few different twists you can put on the usual cubby house type shapes. Consider an A-frame house. You can make this all from timber or even from tin or leftover roofing you may have around. An A-frame cubby is a simple structure to build and gives more of a camping feel to the playhouse that kids will love. You can even put some curtains up as an option for a doorway if you do not want to fully enclose it.

If you do have a strict budget or a tiny yard which does not allow enough space to put a full-sized cubby, consider putting up some smaller shelter structures that will still allow young kids a chance to have their own little hideout. Putting four old door frames together on a simple A-frame shape can make a permanent tent-like structure which little kids will love crawling in and out of. You can do this directly on grass or create your own wooden platform for this to sit on. A project like this can be done in a day and the effects are just wonderful. Even putting up a simple A-frame, frame or an open rectangular design that can be covered with canvas or tarpaulins can be a fun space for kids to create in.

Creative Ideas

Pulley systems can be easily made with a pulley and some rope, simple things you will have lying around the home. Attach a basket or bucket to one end so that kids can bring items up easily into their new home, you will be amazed at how much fun they will have sending things up and down.

Chalkboards are another add-on that can really boost a cubby, kids love writing notes or signs, and a firmly attached bucket can be placed alongside the board to keep in chalk and rag dusters.

Hanging swings off the sides of your cubby can provide some entertainment; regular rope or tire swings are a fun way to go. While adding a hammock inside or even underneath, if your cubby is on stilts, can make a great relaxing area where the kids can enjoy some outside downtime.

Upcycling

Another way you can determine the kind of structure you want to make for your children is by looking at what you already have. You may have a whole pile of scrap wood, and old ladder or used windows. Take a look at these things and see if you can incorporate them into your building to make something really unique and inexpensive. You can also have a look at your local tip shop for any salvaged materials. You may just be inspired by something you see there and your cubby could take on its form to incorporate your key piece.


Cubby Interiors

To complete your kid’s cubby you’ll probably want to have it slightly furnished. If you want to put in cushions and mattresses or even curtains have a think about using sturdier fabric that is more weatherproof than your average inside cushion. These items will no doubt spend some time out in the elements and even if your cubby has a roof on it they are sure to get all manner of dirt and moister on them from kids play, so choose colours and fabrics that are hardier and so you won’t have to wash them every other weekend. If you want to add any furniture be mindful of overcrowding, what kids want is more or less a blank space where their cubby can be a pirate ship, doctors surgery or a shop. Think about this in the design as often a plainer cubby can allow for more imaginative games and experiences.

Design with imagination

Take your time to work with your kids and really design using your imaginations and thinking about what you already have to work with and your existing space. Even the smallest or yards will have room for a little playhouse or cubby and over the years who knows what they will be able to grow and expand into. Remember to look for recycled goods and reclaimed timber to make an eco-friendly, cheap and unique option when creating your kid’s masterpiece. A cubby is something your kids will have fun in for years to come and will get them out into the outdoors and enjoying nature while using their imaginations.

Your Guide To The Essential DIY tools

Who doesn’t love a good DIY project! There’s something so satisfying about really sinking your teeth into a project that will help beautify or make your home that much better. From building a kids cubby, putting up a pergola, or just fixing some leaking drains, if you want to be able to handle it yourself then it’s important you have all the right tools to get the job done. Nothing is more annoying than having to ask your neighbor for this drill or that spanner set. So we’ve outlined a few of those tools that are must-haves to have in the shed for when those do it your self, projects come up. Take a look below and make sure you’re DIY equipped this year!


Hammers

A good hammer is one of the first things you should make sure you have in your DIY toolkit. There are actually a few kinds of hammers to take your pick from such as the Ball Pein Hammer, which has a rounded side to it that is best suited for closing rivets and shaping metal, and the Cross and Straight Pein, also used a lot for metal work. But the hammer we’ll focus on is the most regularly used claw hammer. This is the most useful for your every day around the house needs. It can come with a wood or metal handle that can feature a rubber grip. The claw on the hammer has an inside V shape to it that is created for drawing out nails from wood, and a slight curve so you can really get some leverage.

When you are looking at hammers make sure to give them a good firm hold first, see what weight feels best in your hand and what kind of grip you prefer. Here are a few of our favorites.

High End

Estwing 560g / 20oz Vinyl Grip Claw Hammer

The Eastwing’s Steele curved claw has second to none balance and temper. The head and handle are all forged as one piece and it features a shock reduction grip that is perfect for comfort if you’re using it on one of those long jobs. This hammer is used by professional tradespeople and is a great addition to the toolkit if you think you’ll be giving it a lot of use.

Mid Range

Stanley FatMax 20oz Antivibe Hammer Claw

Another one piece Steele hammer has a special 25% larger than average strike face to make it just that much easier to contact your target. It comes with a soft handgrip and an anti-vibe tuning fork to dampen vibrations.

Best Budget

Trojan 16oz Steel Claw Hammer

The Trojan is a great budget buy, it drives nails in with ease and has a useful extracting claw. Great for your everyday small project the Trojan has an induction hardened carbon steel head and a lightweight fiberglass handle with an anti-slip grip on it.


Spanner Set

Next up on the list is a spanner set. Spanners are those tricky little things that you never seem to have the size you need right when you need it! So buying a spanner set (and making sure you don’t misplace them) is key for your DIY toolbox. Have a think about how much you will find yourself using spanners when you think of purchasing one. No need to buy top of the range if they are only pulled out for small jobs once in a blue moon.

High End

Wera 11 Piece Joker Ratcheting Combination Wrench Set

This is a combination rachet/spanner set and it is for the serious DIY master as it comes with a pretty large price tag, but you certainly get your money’s worth as this combination kit allows you to do a whole lot more. With a special 30-degree return angle these are the spanners you’ll need for those tight spots. It’s unique holding function that cuts out the risk of dropping and nuts or bolts which can so often be the case. The metal plate in the jaw is responsible for this mechanism and can be replaced. It has a ratchet mechanism on the ring end which has 80 fine teeth which come in handy when working in tight spaces. Made from chrome molybdenum steel with a nickel chrome coating, this kit will not be corroding anytime soon and with care and maintenance will be a set to pass on to the grandkids.

Mid Range

Stanley 22 Piece Metric / AF Spanner Set

This set is a great medium range buy, not too expensive, the 22 pieces give you a spanner for every occasion. They come in Full Polish Chrome and have both Metric and AF. Stanley Spanners are heat treated to be strong enough for repeated use. What you need for those maintenance projects around the home.

Best Budget

Craftright 5 Piece Spanner Set

This five-piece set is perfect if you only use a spanner every so often. These sizes (8, 10, 14, 15, 17mm) will fit most average nuts and bolts and are drop forged. They are heat treated and chrome plated and won’t take up much space if you only have a small workshop.

Screwdriver Sets

Screwdrivers are another one of those things that are best to buy in sets. As screws come in all different kinds and shapes, it’s good to have the right one on hand when you need it. The main types of screwdrivers are Slot or Flathead, which have just the one flat edge and Phillips, which feature a cross design. Most screwdriver sets will have a mixture of these, but it’s always best to double-check they are the right ones for the job. From master sets to the basic starter kits here are our go-to buys.


High End

Kincrome 12 Piece Thru Tang Screwdriver Set

These screwdrivers are designed for hard use. The cellulose acetate handle gives it a strength and durability that is second to none. It features a continuous Thru-Tang shaft and a striking end cap which is made for hand hammer blows. These screwdrivers also feature magnetic tip for helping keep your screwdriver attached the screw and minimize drops. The Kincrome screwdrivers also come with a hexagon shaft that helps a spanner attach for those times you need some extra force it trying to get out a stubborn screw. This kit is what you need if you have a lot of DIY going on around the house and garden.

Mid Range

Trojan 26 Piece Screwdriver Set

A combination of slot and Phillips, the Trojan set offers not only regular screwdrivers but also a precision range which is great for driving screws that have special slots. The go-to kit for the around the house handyman they also offer a magnetic tip, to keep those screws in place, a nonslip handle and are made of Chrome Vanadium steel which offers durability and strength. With an easy carry case, they’ll stow away perfectly in your shed.

Best Budget

Stanley 6 Piece Screwdriver Set

To get you started into the world of home improvement is the Stanley six-piece screwdriver set. This comes with four Phillips and two slot/flathead drivers in the most common sizes. There is tip identification on each one so if you’re just starting out there’s no need to be confused! They have a good grip on them and the shafts are made of high alloy chrome so even for the small price tag they are still a sturdy product. Hanging holes are a little added bonus to make them easy to store, as they don’t come with a case. The perfect starting kit for the soon to be the DIY maverick!

Pliers

In any toolkit, Pliers are a must. Pliers are used for a range of things, gripping, twisting, cutting, straightening and bending wires and cables. There are a few different types also, the long nose, sidecut, diagonal and griplock. But our main focus is on the good old combination pliers, a great all-rounder.

High End

Crescent 200mm Insulated Universal Pliers

Coming with insulated grips, a crimper, and precise jaw gap, as well as being a good all-rounder, these pliers specialize in wire work. They feature insulation for 200mm 1000V High Voltage and a serrated pipe grip. These are for the handyman who knows what he’s doing.

Mid Range

NWS 205mm Combination Pliers

These German-made pliers feature an inductively hardened cutting edge ideal for cutting through the toughest wires. Asymmetric inside jaws help you get a better grip. They include an integrated ring spanner and multicomponent sleeves on the handle for a more comfortable use over long periods of time.

Best Budget

Craftright 200mm Combination Pliers

The pliers are made from vanadium steel and have a soft gripping handle. A simple product at a great price so there is really no excuse not to have a pair on in your toolbox.


Saws

A basic saw is a must-have. For trimming off wood and cutting things down to size, a good quality saw is something you’ll always use.

High End  
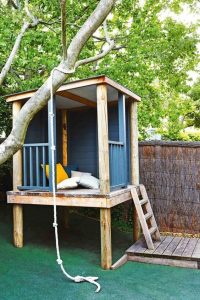
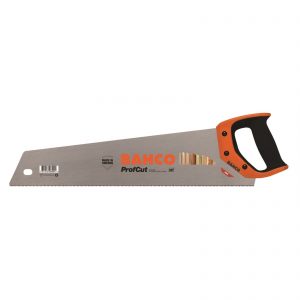
Bahco 500mm Precision Hand Saw

A professional level handsaw, the Bahco Precision it great for getting through both fine and thicker materials with ease. A great feature of this saw is its adaptability to mitre guide sawing. Featuring 9/10 TPI hard point teeth, this saw stays sharper for longer. The Bahco Precision Hand Saw gives a great professional finish for those larger DIY projects

Mid Range

Spear & Jackson 500mm Predator Hand Saw

The Predator Hand Saw is perfectly suited to those trimming jobs with wood and plastic pipes. A .91mm blade keeps the saw ridged and cuts down on vibration and whip so you can get your cutting done fast without compromising on precision. A good and reliable blade for its price point with a nice soft handle will make using it easy.

Best Budget

Irwin Jack Plus 338mm 8PT Hand Saw

Featuring a nonslip comfortable grip handle and razor sharp tooth design, this saw will work perfectly well for you basic push and pull saw jobs. Made from .85mm premium cold rolled steel and surface treated for rust resistance this is a great beginning saw.


Tape Measures, levels, and Squares

These are really some of the first things you should have in your kit. It’s no good hammering in nails if you’re doing it at the wrong height or sawing your wood on the wrong angle! Pretty self-explanatory tools, we’ve put down some great quality ones with prices to match.

Stanley 5m Tape Measure

Your Stanley Measuring Tape is a great sturdy medium range tape. With belt clips for easy sliding on and off use and a polymer coated ¾ inch blade. This measure is a must have for your toolkit.

Empire 200mm Polysteel Try Square

At a reasonable price, the Empire Try Square has a mini level in its handle which gives it great dual use. It features a stainless steel blade, which has metric graduations on both sides.


Stabila 600mm Spirit Level

A spirit level is something worth investing in. Getting a correct level can be vital to some of your DIY and home improvement projects. That’s why you need a great reliable product like the Stabila Spirit Level. It has a 300-degree visibility horizontal vial and shock absorbing end caps to help protect it. Electrostatic stable vials mean high accuracy and you can’t beat that German precision!

Drills

Finally, we come down to drills. Those wonderful machines that make DIY work just that much easier. These days there is such a great range of drills to suit all purposes. Cordless drills for home improvement projects really are the way to go.


High End 

Bosch 18V Cordless Drill Driver

A powerful motor and a sleek design, The Bosch PSR 1800 is a great drill to have for those bigger DIY projects. Coming with 2 x 1.5 AH Bosch Smart Lithium-ion Batteries you’ll always be charged and ready to go. An LED power light makes it great when trying to get into corners and dimly lit areas. The Bosch has 20 torque settings plus optimum power drill settings. Its also features Electronic Cell Protection which protects it against overheating and tool overload. Even with 2 high-performance speed gears, the Bosch is still lightweight and easy to use.

Mid Range

Ryobi 12V 1.3Ah Drill Driver Kit

This is your perfect midrange drill for those at home fix-up jobs. Also featuring an LED light and configurable clutch settings this is a compactly designed drill that packs some punch. A 10mm keyless chuck makes switching drill bits easy and soft grip technology make sit a pleasure to hold. A great drill for its price bracket.

Best Budget

Ozito 710W Hammer Drill

If you don’t get much time to do big projects out in the garden or around the house but need a drill just for those occasional fix-up jobs then the Ozito Hammer Drill is the one for you. It has a great drill depth preset to make sure you don’t go deeper than you need to, and variable speed so you can adjust the drill to what materials you will be using it on. I can be used just as easily for right and left-handers with its special 360 side handle and comes with a startup kit of eighteen drill bits. Great for all that light DIY work around the home.

Get Going!

Now you’ve got your DIY essentials you can start up all those projects you’ve been dreaming of around the house or in the backyard. Get that back patio happening or the roof extension. Spend time designing clubhouses with your kids or just patch up some of those leaks!

Always be mindful when doing DIY jobs, of safety and that when it comes to electrical work its best to consult a professional.

5 Best Lawn Fertilizers for the Backyard

best 5 lawn fertilizers

Why are Fertilizers Needed for Grass or Lawn?

When an individual buys a home, there are many different things that they will be responsible for. Taking care of the lawn around the home properly is one of the very first orders of the day, and is an ongoing process. This is because the lawn can grow too high and cause several different hazards like snakes and other little annoying critters appearing in the wrong places. It is also important to maintain the lawn so that it looks pleasing to anyone who passes by. Either way, it is essential that the owner does not neglect this area of their investment if they want to display the best look possible and reap a bigger profit if they decide to sell.

That said, taking care of the backyard of a home comes with many different challenges. In some cases, the lawn may grow like wild fire or it may not grow at all. To resolve the problem that the owner is experiencing, it is essential that they do their homework in advance. For instance, if the lawn is not growing healthy as it really should, there are a diversity of ways to correct these problems. One of the most common and notable is ensuring the lawn has the nutrients that it needs. This is one of the primary reasons why most people use fertilizers to build up and grow a lawn in their backyard that is healthy, green and thick.

How often should you fertilize your lawn?

As previously mentioned, the lawn needs nutrients to grow properly. However, before the owner begins to provide the lawn with the nutrients that it needs, there are some things that they should know. In specific, the timing for fertilizing the lawn can be vastly different based on the location in which the owner of the home lives and the growing season. For instance, if the person lives in the South, the requirements for fertilizing the grass is usually in the spring and the summer months. On the other hand, if the individual lives in the North, the fertilizer should be used in the fall and spring seasons. Of course, it is also important to feed the grass as often as possible without over feeding it. As a general rule of thumb, however, it is important to note that the more the owner feeds the grass, the more that it will grow. Additionally, the owner will also need to be familiar with other factors about this topic including knowing when the growth cycle is. For it is in these times, that the fertilizer is not only a requirement for that specific time, but a necessity if they want their lawns to flourish.

Safety First – Precautions when using Fertilizing Chemicals

fertilizer safety

Fertilizing the lawn is a chore that owners have to do every year in order to make sure the grass on the lawn grows as healthy as it possible. Fortunately, there are many different ways to do it since the industry provides a wide variety of different tools and equipment to make these jobs much easier. Before starting the process, people should always make sure that the family is following the appropriate safety precautions. Specifically, as it relates to handling these types of hazardous chemicals on a fairly regular basis. That said, here are some tips and recommendations that can be used to keep the family and their pets safe.

Store the Fertilizer in Cool Dry Places

To keep the family and pets safe from harm, it is important that the homeowner keeps the fertilizer stored in the right place so that no one is accidentally injured or harmed. Fortunately, there are guidelines that professionals in the industry have used and shared over the years, and they should be followed as closely as possible if the owner does not want to experience any negative results in or around their homes. So, one of the most basic guidelines is to store the fertilizer in a cool dry place that is far away from the reach of children and the family’s pets. For instance, some people prefer to keep it in their garage area, which means it is outside of the home at all times. To keep it out of reach of children who enter the garage area, it is very important to place it up high on shelves so that they cannot reach even when they are trying (too far up for them to reach it from a chair). For extra precautions, the garage door should also be locked after each use from anyone who should not have any access to it.

Use Gloves When Handling

Because of all of the hazardous chemicals normally contained inside the fertilizer, it should also be handled safely by putting on gloves before the person begins to start handling it. For instance, because fertilizer contains nitrogen, which can cause mild to severe burns if it is not handled right, especially since the nitrogen is a chemical that should not be touched with the bare hands. However, in the situations or circumstances where someone inadvertently touches these chemicals, they should wash that part of the body with running water immediately. In case the fertilizer affects them anyway, (i.e. burning, redness of the skin) the homeowner should contact their physician right away.

After Application Guidelines

Once the fertilizer has been applied to the lawn, it is important for the homeowner to follow through carefully with certain precautionary measures. Meaning until the lawn has been watered or it rains on the lawn, children and pets should be kept off the grass. To keep the neighbors near these areas safe, it is also best to notify them too to avoid any unnecessary problems.

Read the Instructions Closely

Because each manufacturer knows their products and the risks associated with them, there may be some special guidelines that must be observed for use. So, before the owner of the home begins to use a specific type of lawn care product, it is essential that they read the instructions on the package first. Because some products are organic and others are not, knowing the difference between the two is critical.

Reviews for the 5 Best Fertilizers for the Backyard

#1 – Milorganite 0636 Organic Nitrogen Fertilizer

Milorganite-Organic-Nitrogen-Fertilizer

Milorganite 62036-MW Organic Fertilizer is on the list as being one of the most trusted names in the lawn care industry. In fact, it is not uncommon for this fertilizer to not only be used in the back yard of a home, but also in professional setting like golf courses and zoological foundations. This is because this lawn care product has earned its trust in the industry. Even though this product is made specifically for lawn grass, it is still versatile enough to be used in other areas of the lawn including in the trees, flowers, and the shrubbery.

This product has been Formulated with heat-treated microbes and contains both nitrogen (5%) and phosphorus (2%), along with.3 percent potassium. It’s also made with other essential ingredients that provide a wide range of nutrients like manganese, copper, sulfur, and zinc. This fertilizer is also safe to be used around kids and pets and can be applied to the lawn anytime its growing season, in any climate.

see price here…

#2 – Miracle-Gro 1001832 Lawn Food

Miracle-Gro 1001832 Lawn Food

Miracle-Gro Lawn Food can be described in a number of different ways. First of all, it is a fertilizer that is easy to use, and its affordable so homeowners do not have to pay a high price to purchase it. Also, because the ingredients are so concentrated, the homeowner may only need to feed their lawn no more than once or twice each season. In fact, all the owner need is at least 1 – 5 pound box that will cover an area of 4000 square feet. This fertilizer is made specifically for those who do not like all of the unnecessary hassles of fertilizing the lawn, but they still want an exceptionally great looking backyard to entertain their family and friends in.

see price here…

#3 – Scotts Turf Builder All Season Lawn Fertilizer

Scotts 26007B Turf Builder Southern Lawn Fertilizer

Another industry favorite is Scotts Turf Builder Lawn Food. In fact, many professionals in the lawn care field may deem this product as one of the best known lawn fertilizers in the world. This is because most homeowners will find that their grass will simply thrive on all of the ingredients in this formula. Made with nitrogen and potassium, the owner can purchase about 12 pounds to feed a lawn that covers about 5000 square feet. The recommended feeding time frame with this product is about 6 to 8 weeks during that areas growing season.

In comparison to other well-known brands, this fertilizer has a high priority position on the top of the list of the least expensive fertilizers in the industry. Additionally, most professionals and homeowners prefer this type of fertilizer as their number one choice because it helps to holds water inside the soil. Meaning this fertilizer has been designed to keep the grass hydrated for much longer periods of time. Due to its popularity as one of the best fertilizers, this product can be found virtually anywhere. Even though Scotts Turf Builder Lawn food is not organic or made of all natural fertilizer products, it is still made with kid and pet friendly ingredients. Many homeowners prefer this fertilizer because it protects the lawn against various kinds of future problems, helps with building strong and deep roots, improves the lawn’s capability to absorb the nutrients and water that is needed. It can be used on any type of grass and in any season. Another great benefit that many homeowners love is everyone is able to re-enter the lawn again without having to wait for a rain storm or the lawn to be watered after its application.

see price here…

#4 – Safer Brand 9333 Ringer Lawn Fertilizer

Safer Brand 9333 Ringer Lawn Fertilizer

Here’s another great fertilizer that people may or may not know about and that is the fertilizer called Safer Brand 9333 Ringer Lawn fertilizer. This fertilizer gives the owner of the home the biggest value for their bucks. The ingredients contained in this product comes from a diversity of sources including nitrogen from feather meal, while it also uses bone meal in order to release the nutrients slowly in the soil. Soybean is used to keep the concentration even because it used as a filler. With this slow release formula, owners will enjoy thick grass growth as it also chokes out all of the weeds naturally. The amount supplied in a 25-pound bag is enough to cover the space of 5000 square feet. Because it is based on an organic formula, it is safe for both kids and pets. One of the best features about this product is it works well when other fertilizers don’t.

see price here…

#5 – Espoma ELF20 20-Pound Organic All Season Lawn Food

Espoma-ELF20-20-Pound-Organic-Season

The maker of this fertilizer has been in business for approximately 90 years, and has a solid reputation for manufacturing the highest quality products. Second to none, Espoma ELF20 20-Pound Organic All Season Lawn Food, is on the list of the top favored fertilizers in the industry. Even though this brand is a little more expensive, it is considered to be well worth the investment, especially since it has been made to rival with any of the top rated products on the market today. Buyers who want organic formulas to feed their grass will be happy to know that it is safe for kids, pets and anyone who enters the property after it has been applied to the back yard. The amount needed to feed a 1000 square foot lawn is about 3.3 pounds. It is also recommended that the lawn be fed at least 4 times a year during the geographical location’s growing season.

see price here…

Summing Up

Taking care of the backyard of a home can be a challenging experience. However if the owner of the home does their research well in advance, they can identify the top fertilizers that many in the lawn care industry are recommending today. Fortunately, there are a products online that people can review to see which ones will provide the best treatment for the grass and yield the best results.